prima.cpp是llama.cpp的分布式实现。
首先准备好集群。然后先下载模型,下载时间有点久(以qwen2.5-7b-instruct-q8_0.gguf为例)。目前支持的模型列表如下,目前只支持三种量化格式:Q4KM、Q6K、Q80。目前不推荐下载Q4KM量化格式模型,加载 Q4_K_M(Q4KM) 模型时,框架在检查 tensor 的 ftype 枚举后发现后端无对应算子,直接触发异常断言“ggml_blck_size(type) == 0″,会直接core dumped。
用fping和arp工具找出集群的IP地址
## 用fping来扫描局域网段的客户端
fping -a 192.168.2.1 192.168.2.255 -g -q
## 随后用arp查看ip对于的mac地址
arp
根据mac地址可以找到地址为
- 192.168.2.113
- 192.168.2.116
- 192.168.2.117
- 192.168.2.120
我们把120当做master节点 其余的都为worker节点
环境安装
这里就以120节点为例
sudo apt update -y && sudo apt install -y gcc-9 make cmake fio git wget libzmq3-dev
下载模型文件
wget https://www.modelscope.cn/models/Qwen/Qwen2.5-7B-Instruct-GGUF/resolve/master/qwen2.5-7b-instruct-q8_0.gguf
安装fio
prima.cpp提出Halda算法,在调度之前需要使用去检测算力、GPU 性能、网络带宽、disk等。k1开发板上的 fio 工具缺少 libaio,需要克隆 fio 仓库,重新编译:
sudo apt-get install build-essential pkg-config
git clone https://github.com/axboe/fio.git
cd fio
./configure --prefix=/usr
make -j$(nproc)
sudo make install
安装HIGHS
HIGHS是一个高性能线性优化库,在 prima.cpp 里主要是用于规划“每个节点分几层,模型哪些层放到GPU,模型哪些层卸载CPU等“。克隆HIGHS:
git clone https://github.com/ERGO-Code/HiGHS.git
cd HiGHS
mkdir build && cd build
cmake ..
make -j$(nproc)
sudo make install
克隆 prima.cpp 仓库
git clone https://github.com/Lizonghang/prima.cpp.git
cd prima.cpp
make USE_HIGHS=1 -j$(nproc)
其他的三个worker节点都需要按这个步骤来安装环境
部署大模型
在四台主机上分别运行如下命令,我们把120当做master节点,其他的三个为 worker,结构如下

各节点启动命令如下
##192.168.2.120: rank0
./llama-cli -m ~/prima/qwen2.5-7b-instruct-q8_0.gguf -c 1024 --world 4 -p "what is edge AI?" --rank 0 --master 192.168.2.120 --next 192.168.2.113

##192.168.2.113: rank1
./llama-cli -m ~/prima/qwen2.5-7b-instruct-q8_0.gguf  -c 1024 --world 4 --rank 1 --prefetch --master 192.168.2.120 --next 192.168.2.116

##192.168.2.116: rank2
./llama-cli -m ~/prima/qwen2.5-7b-instruct-q8_0.gguf  -c 1024 --world 4 --rank 2 --prefetch --master 192.168.2.120 --next 192.168.2.117

##192.168.2.117: rank3
./llama-cli -m ~/prima/qwen2.5-7b-instruct-q8_0.gguf  -c 1024 --world 4 --rank 3 --prefetch --master 192.168.2.120 --next 192.168.2.120
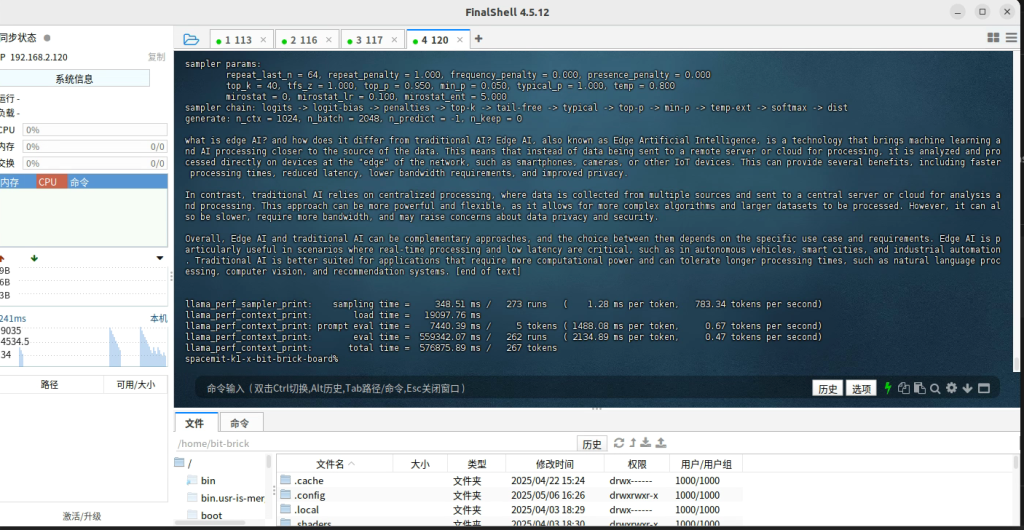
运行效果如图:
最后,感谢群友麻瓜提供的思路和问题解答

