
EMQX is a large-scale distributed IoT MQTT server with over 10 million downloads worldwide. Since the open source version was released on GitHub in 2013, it has been widely recognized by more than 20,000 enterprise users from more than 50 countries and regions, and has connected more than 100 million IoT key devices.
Not long ago, EMQX released version 5.0, which has also been greatly optimized and upgraded in terms of message transmission reliability and product experience usability. It is a milestone achievement in the MQTT field. In the pre-release performance test, the EMQX team achieved 100 million MQTT connections + 1 million message throughput per second through a 23-node cluster, making EMQX 5.0 the most scalable MQTT server in the world so far.
EMQX currently supports running in Linux, Windows, macOS, Raspbian and other systems, and also supports deployment using Docker, Kubernetes, and Terraform. This article will take EMQX open source version 5.0.4 as an example to introduce how to build a single-node MQTT server in the Bianbu system, and demonstrate the common problems that are easy to encounter during the construction process one by one.
Install EMQX
The demonstration environment used in this article is: K1 single-board computer
emqx does not provide the installation package of riscv version. We can install it as follows:
Installation dependencies
sudo apt install libssl-dev
sudo apt install libcurl4-openssl-dev
sudo apt-get install autoconf
Porting erlang/OTP which is required for emqx to compile
$ git clone https://github.com/erlang/otp.git
$ git checkout OTP-26.2.4
$ ./configure
$ make –j$(nproc)
$ make install
Porting emqx
$ git clone https://github.com/emqx/emqx.git
$ git checkout v5.6.0
$ make –j$(nproc)
Once the build is completed , enter the below command to start emqx shell
$ _build/emqx/rel/emqx/bin/emqx consoleEMQX operation check
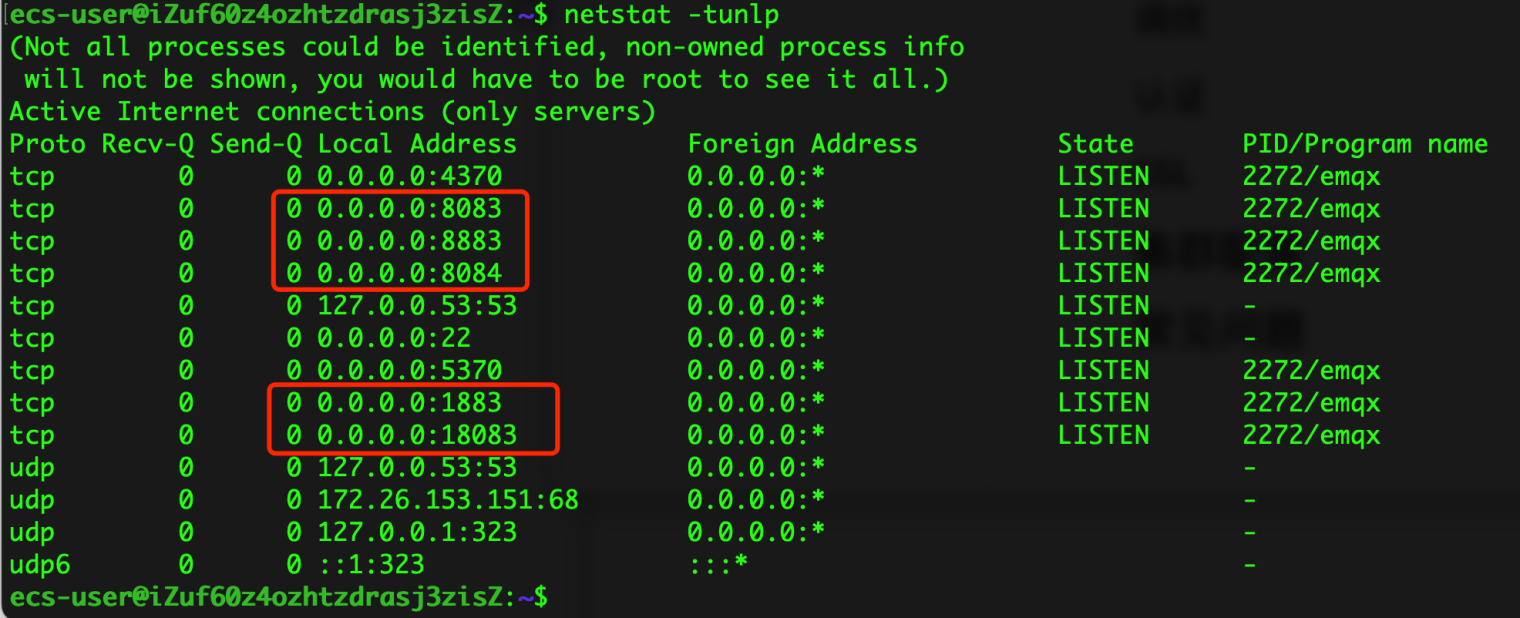
Port monitoring status
Use the command netstat -tunlp to check the operation of the EMQX port. By default, EMQX will start the following ports. If there is any abnormality, please check the port occupancy.
This command can also be executed before installing EMQX to ensure that the relevant ports are not occupied.
Access Dashboard
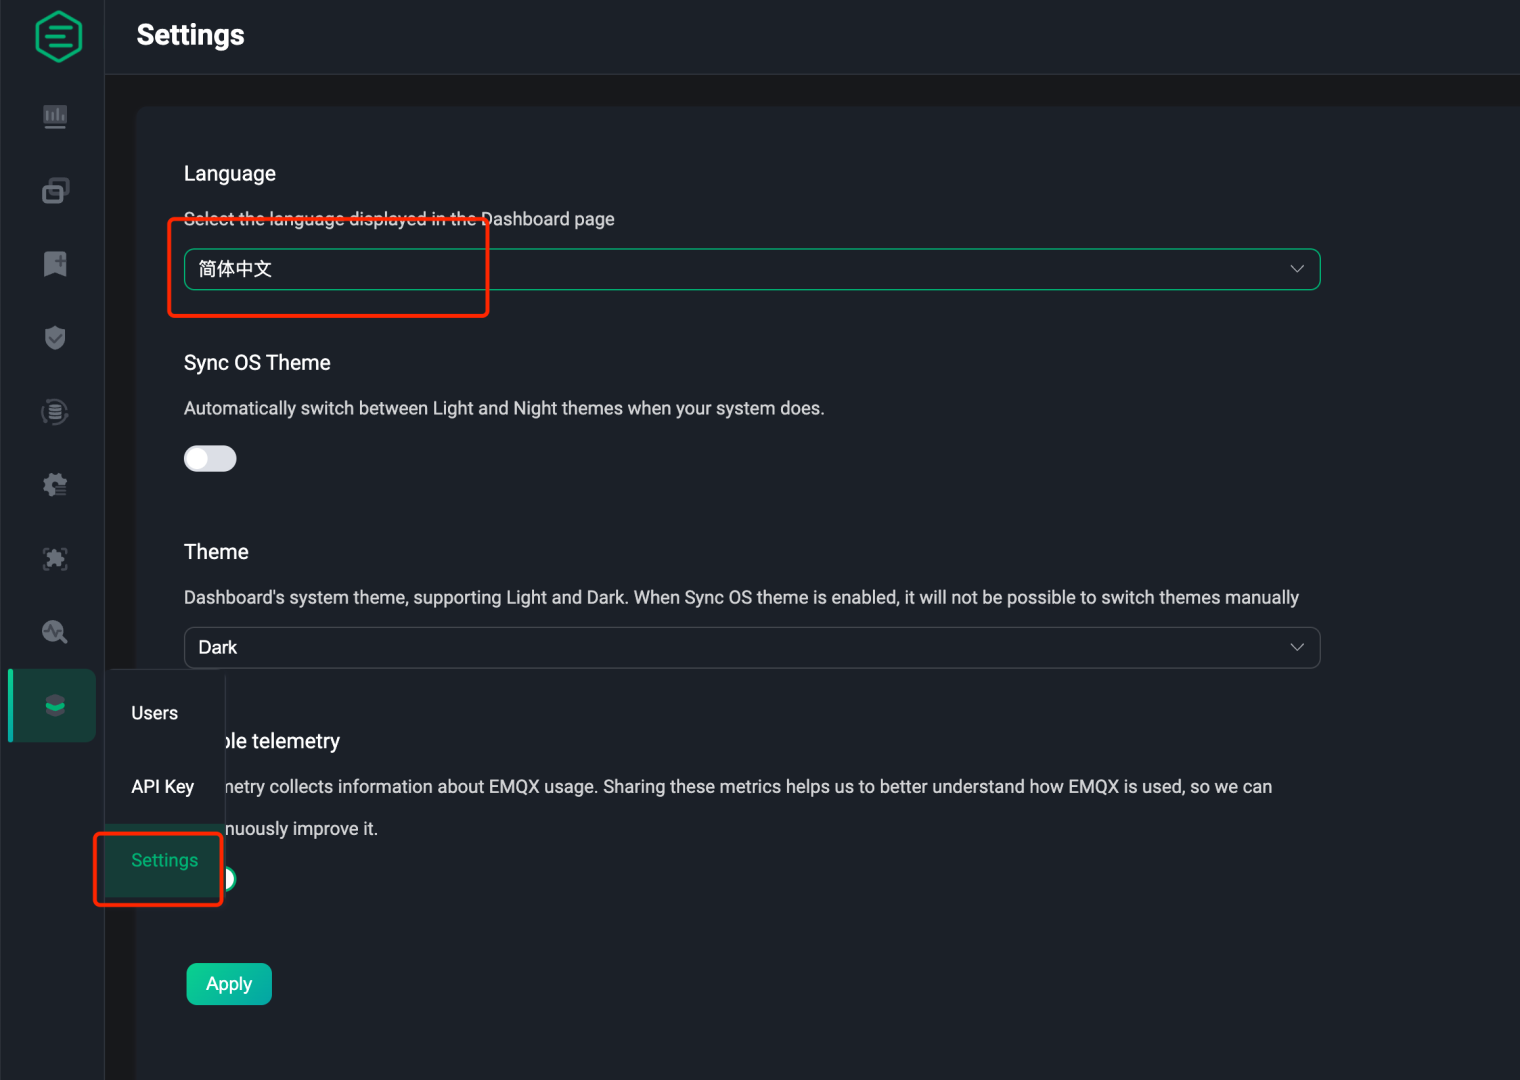
EMQX provides a Dashboard to facilitate users to manage, monitor EMQX and configure required functions through the web page. After EMQX is successfully started, you can access the Dashboard by opening http://localhost:18083/ (replace localhost with the actual IP address) through a browser.
Before accessing the Dashboard, you need to make sure that port 18083 is open in the server firewall.
The default user name of Dashboard is admin and the password is public. You will be prompted to change the password after the first successful login. After the password is changed, we can also change the language of Dashboard to Simplified Chinese on the Settings page.
MQTT connection test
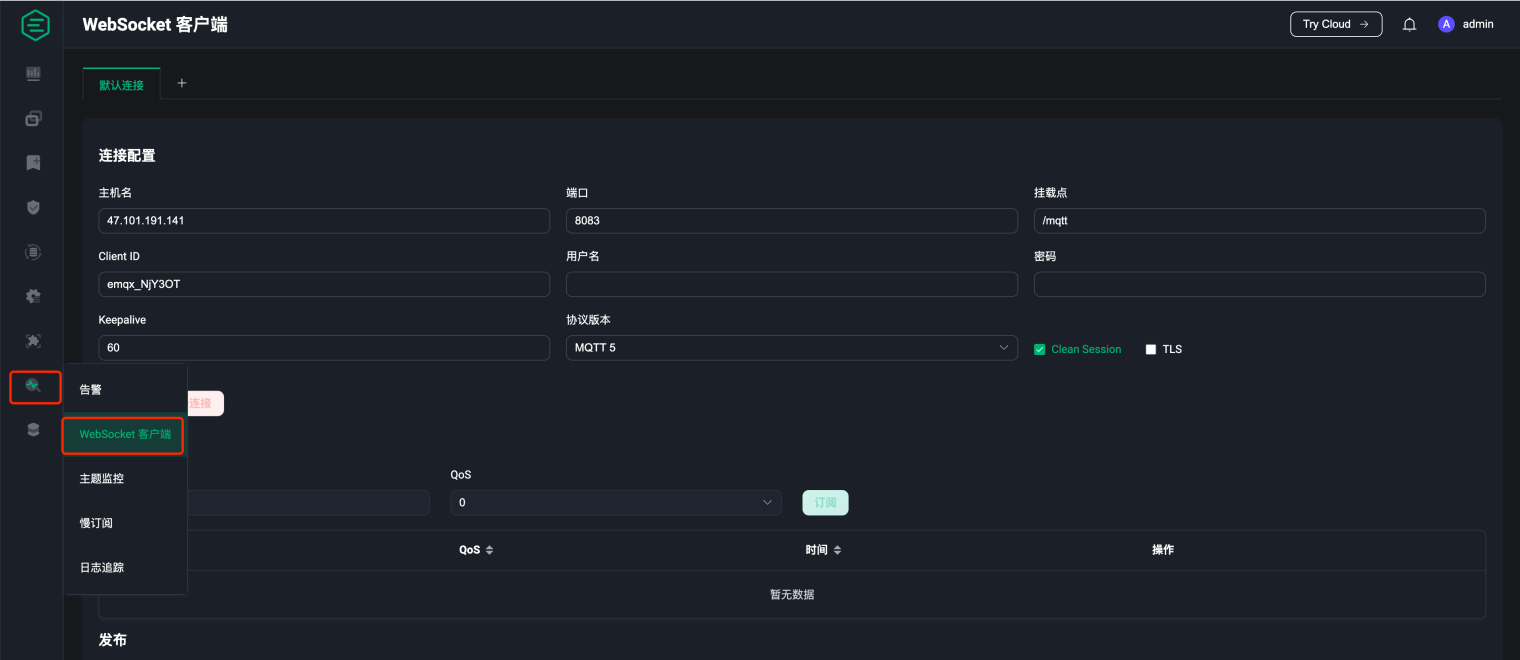
Next, we click on the WebSocket client in the left menu bar. This client can test MQTT over Websocket and verify whether the MQTT server has been deployed successfully.
You need to ensure that the firewall has opened access to port 8083
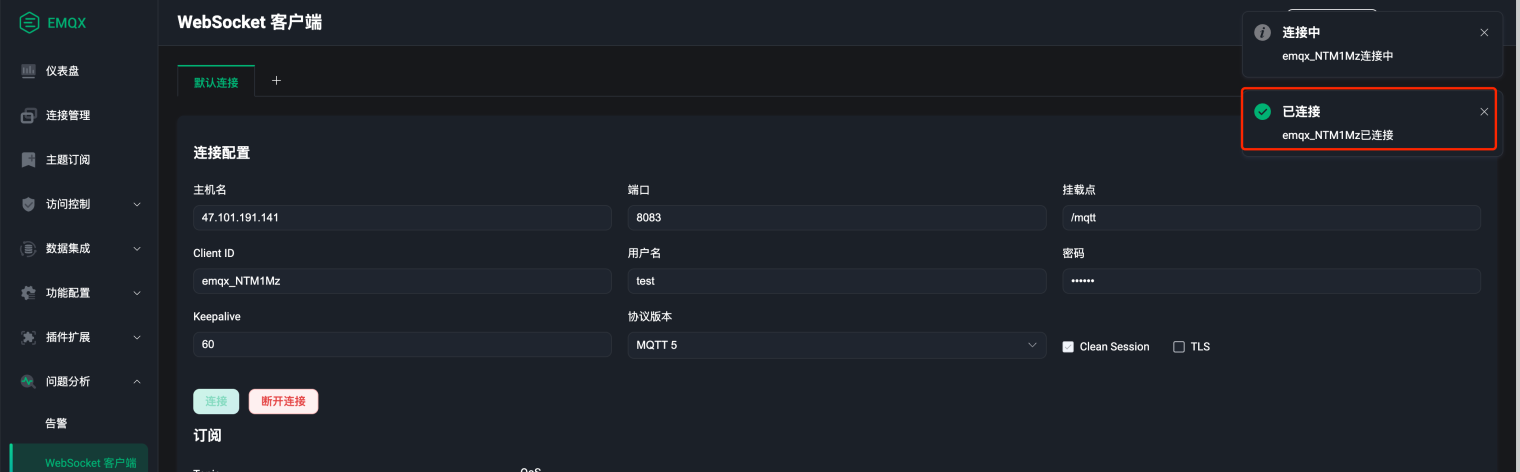
Connect to MQTT server
As shown below, the tool has automatically filled in the host name based on the access address. We can directly click the connect button.
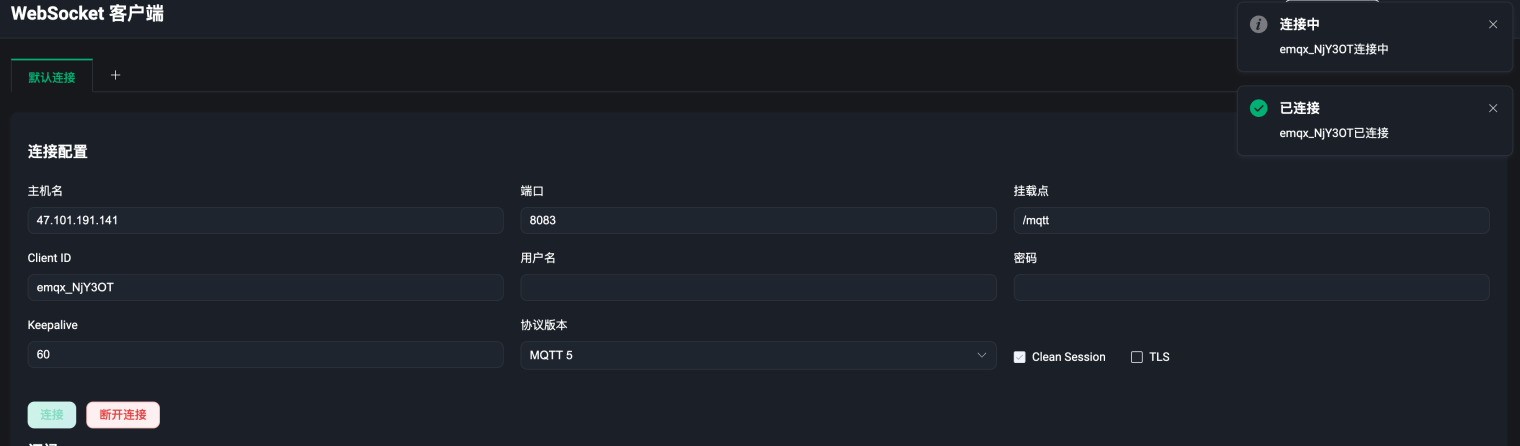
As shown in the figure below, the connection is successful.
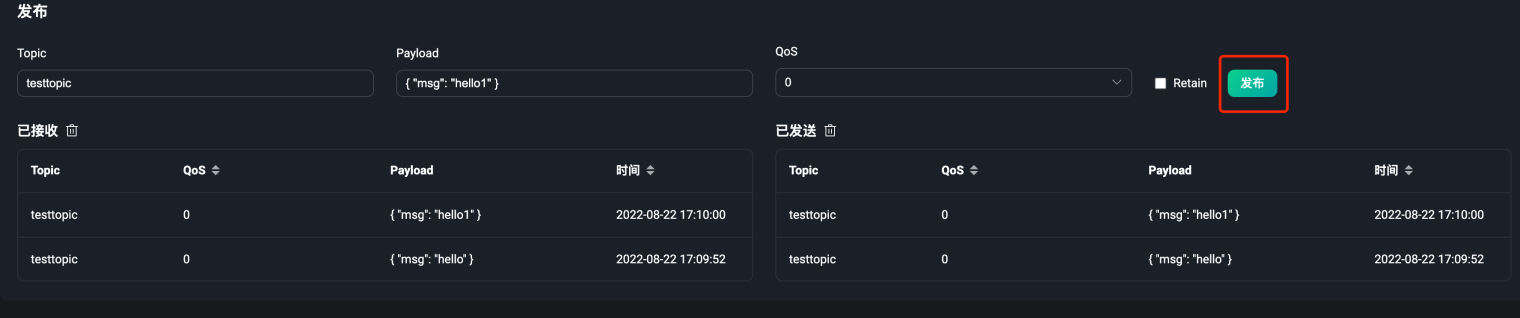
Subscribe to a topic
As shown below, subscribe to a testtopic topic.

Message publishing
As shown in the figure below, we published two messages to testtopic and received them successfully, indicating that the MQTT server has been deployed successfully and is running normally.
So far, we have completed the construction and connection test of the MQTT server, but this server can only be used for testing. If we want to deploy an MQTT server that can be used in a production environment, we also need to perform the most important authentication configuration.
Configure authentication
By default, EMQX will allow any client to connect until the user creates an authenticator. The authenticator will authenticate the client based on the authentication information provided by the client. Only after the authentication is passed can the client successfully connect. Next, we will demonstrate how to use the EMQX built-in database for username and password authentication.
EMQX also provides authentication integration support with multiple backend databases, including MySQL, PostgreSQL, MongoDB and Redis.
Check the documentation for more authentication methods: https://www.emqx.io/docs/zh/v5.0/security/authn/authn.html
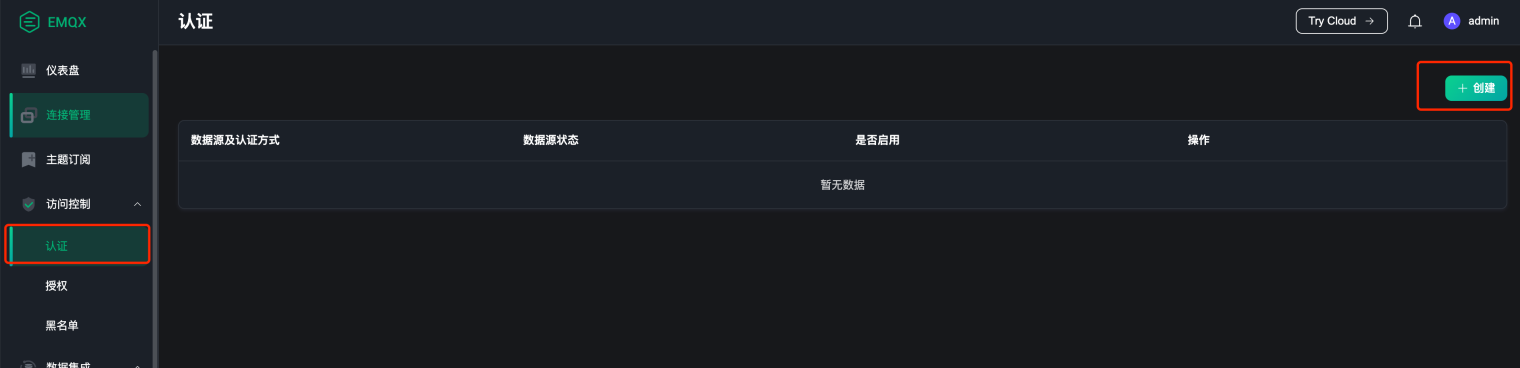
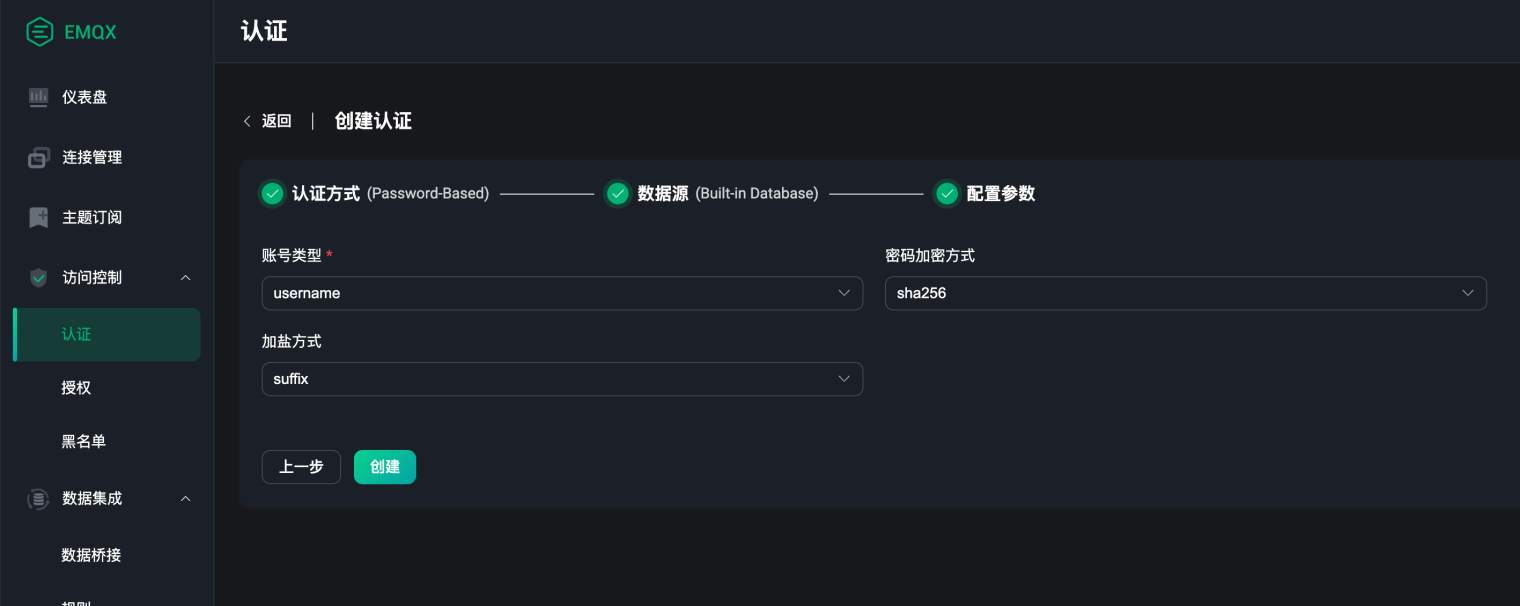
Create authentication
EMQX supports configuring authentication in Dashbaord since version 5.0, so that users can create secure MQTT services more conveniently and quickly. We click Authentication under the Access Control menu to enter the authentication configuration page, and then click the Create button on the far right.
Select the Password-Based option and click Next.
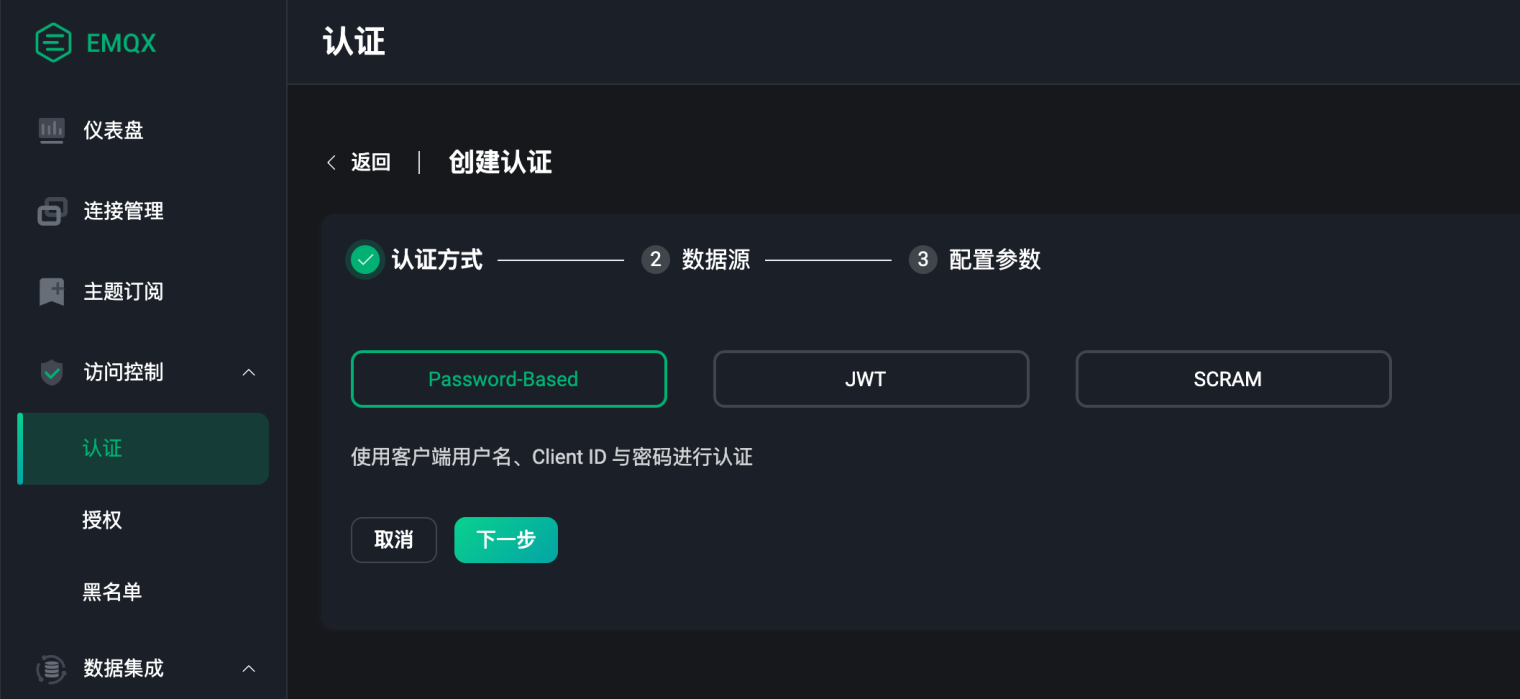
Select the Password-Based option and click Next.
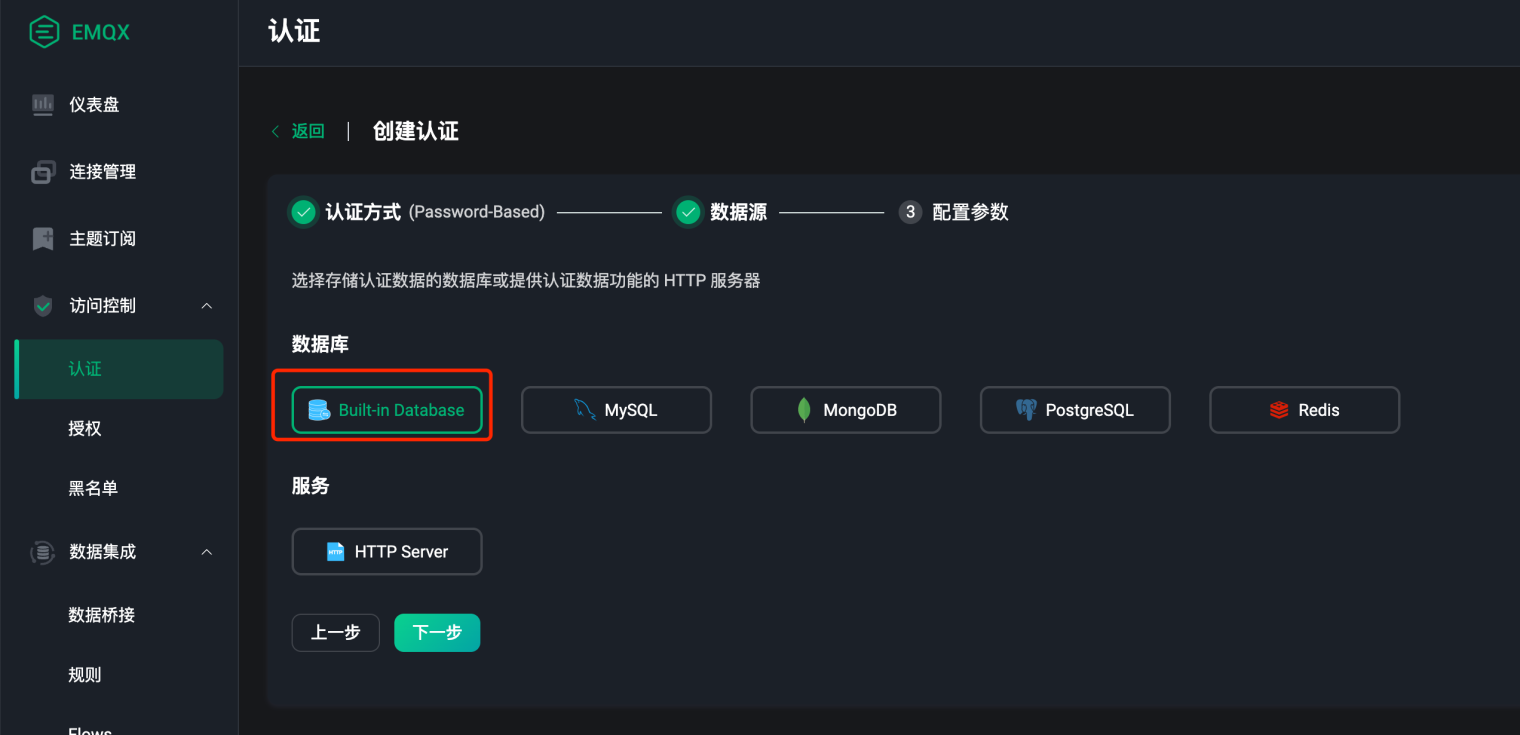
Next, select the account type, encryption method, salting method, and click Create.
Here we use the default configuration, and readers can choose according to actual business needs.
Add User
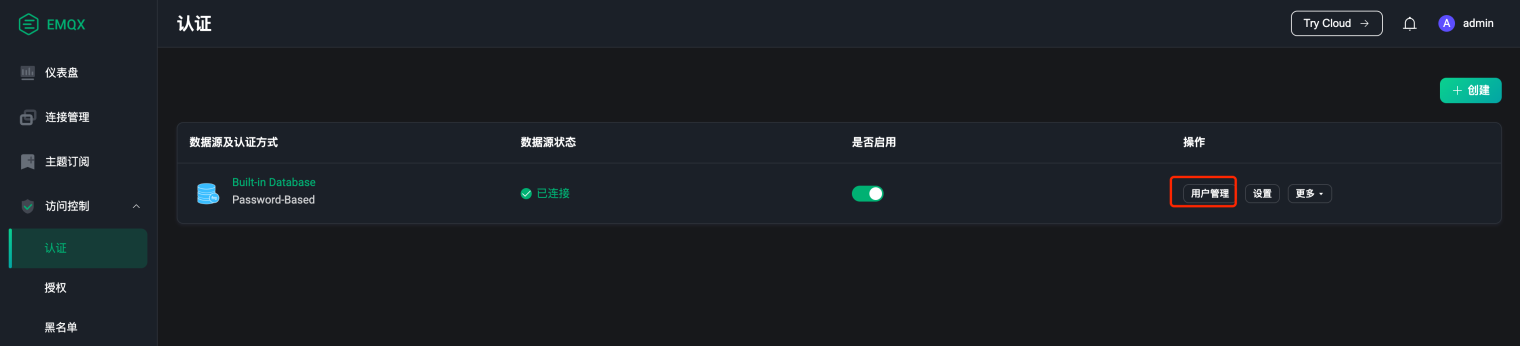
After the authentication is successfully created, the following figure will be shown. Next, we click User Management to add a user.
After entering the user management page, we click the Add button on the far right, set the username and password in the pop-up box, and then click Save.
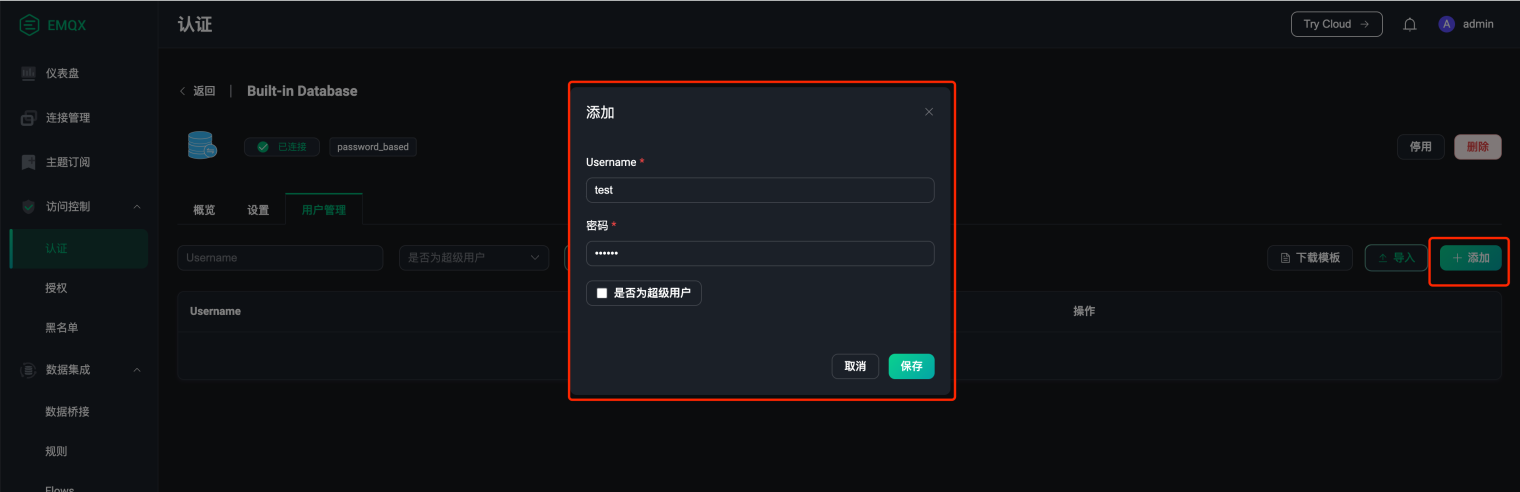
The following figure shows that the creation is successful.

Test authentication
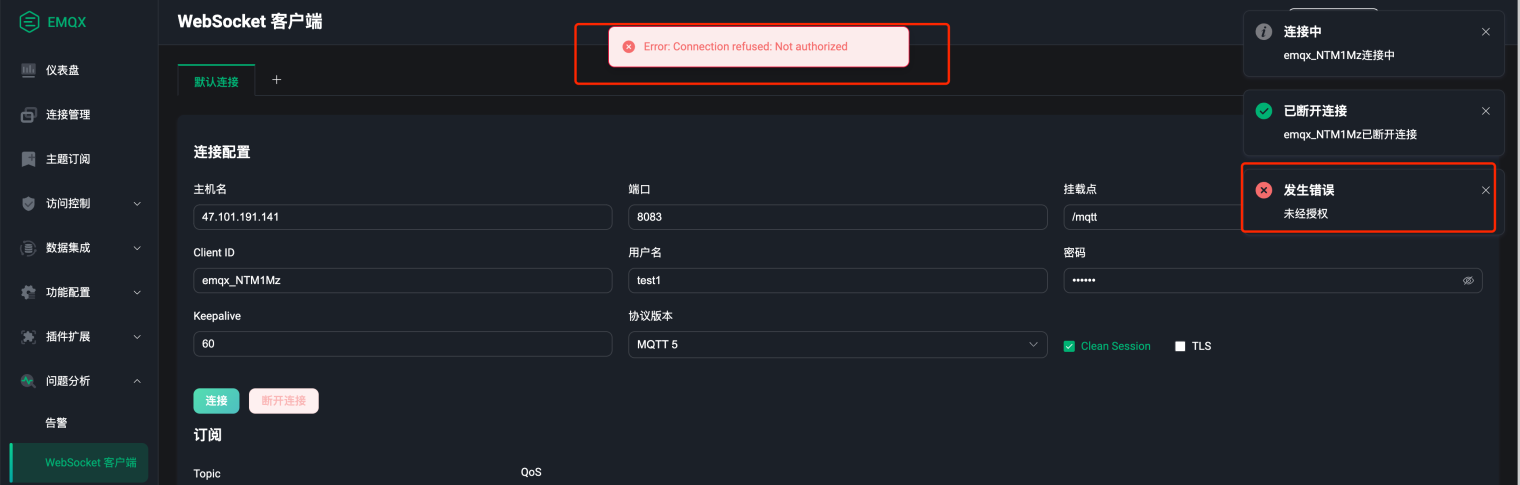
Next, we use the Websocket tool provided by the Dashboard to test whether the authentication has been configured successfully. Enter the username and password just created in the connection configuration, and then click Connect.
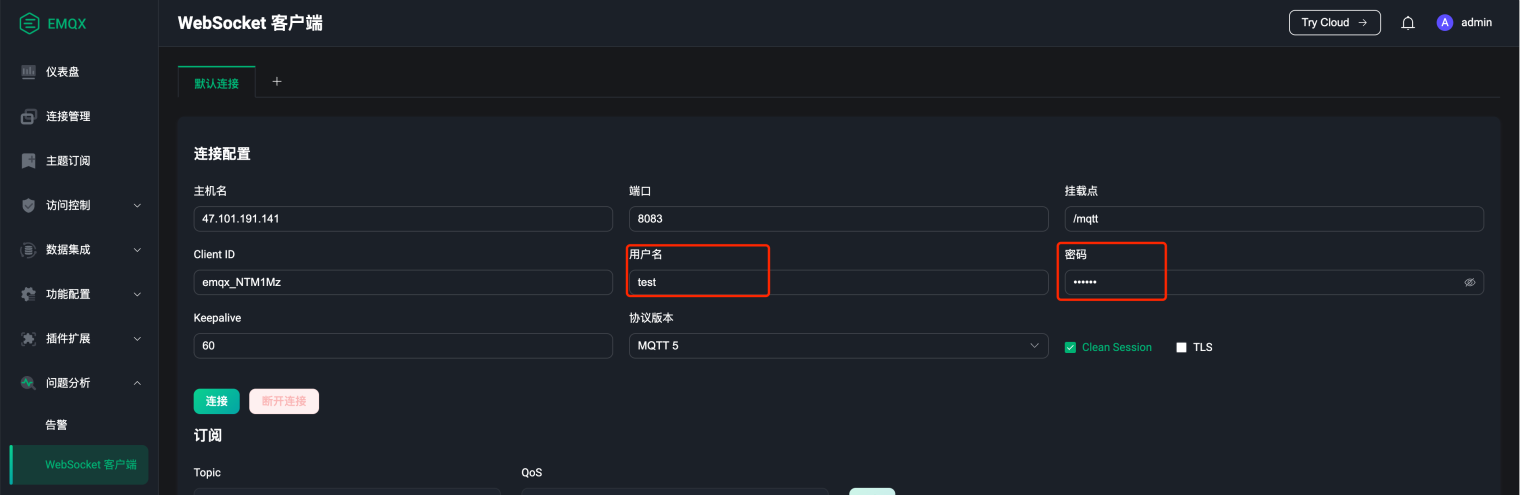
You will see a pop-up window on the right indicating that the connection has been established.
Next, we use an uncreated username test1. Click Connect and you will see the following connection failure message.
So far, we have completed the authentication configuration of EMQX and built a single-node MQTT server that can be used in a production environment. To ensure the high availability of the MQTT server, you also need to create an EMQX cluster of multiple nodes. The specific details of creating a cluster will not be described in detail in this article. Readers can refer to the EMQX cluster document for configuration.

